15 Gingerbread House Recipes for Styling and Photography Guide
Creating a gingerbread house represents more than just a holiday activity. It combines baking precision with architectural vision and artistic decoration. Whether you are constructing a simple cottage for family enjoyment or building an elaborate structure for professional photography, the foundation begins with selecting the right recipe and understanding fundamental construction principles.
The tradition of gingerbread houses dates back centuries, yet modern bakers have refined techniques that ensure structural stability while maintaining visual appeal. This guide presents fifteen distinct recipes alongside professional styling and photography methods that transform your creations into stunning displays worthy of documentation and celebration.
Success in gingerbread construction requires matching the recipe to your intended purpose. Some formulas prioritize taste, while others focus on durability. Understanding these differences and mastering basic techniques ensures your house remains standing throughout the season while looking spectacular in photographs.
Classic Traditional Gingerbread House Recipe

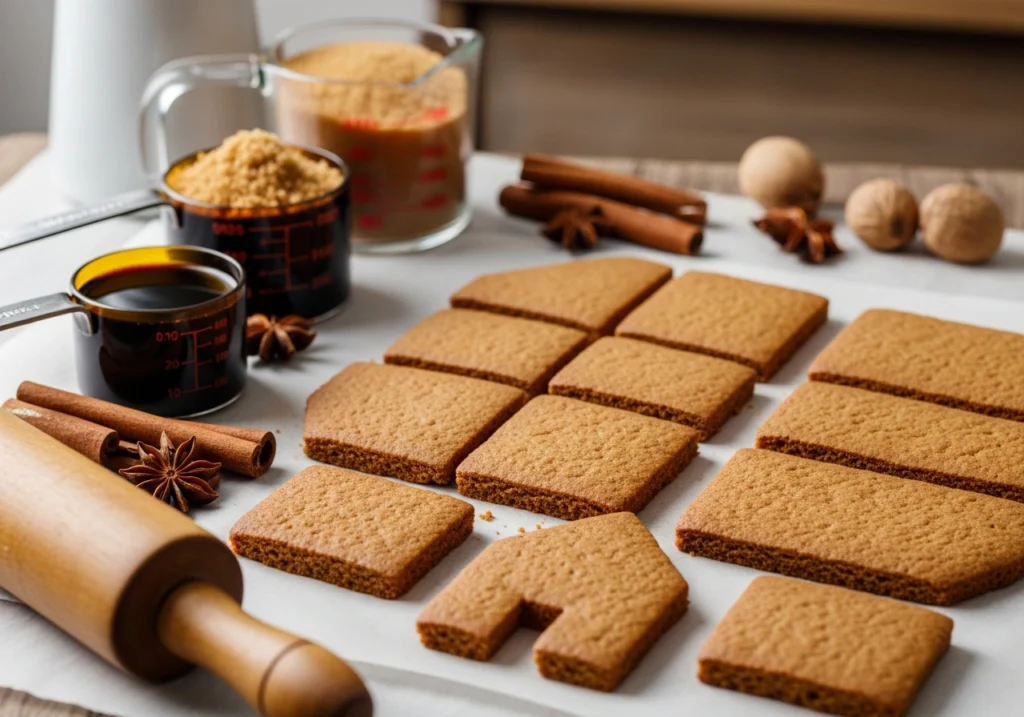
Traditional gingerbread forms the foundation of countless holiday memories. This time-tested formula balances flavor with structural integrity, making it suitable for both display and eventual consumption. The recipe combines standard pantry ingredients into dough that bakes firm yet remains pleasantly aromatic.
Begin with six cups of all-purpose flour, one teaspoon of baking soda, and half a teaspoon of salt. Add one tablespoon each of ground ginger and cinnamon, along with half a teaspoon of ground cloves and nutmeg. These spices create the distinctive warm character associated with gingerbread architecture.
For wet ingredients, cream one cup of softened butter with one cup of brown sugar until the mixture becomes light and fluffy. Incorporate one and a half cups of molasses and two eggs, mixing until thoroughly combined. The molasses provides both deep color and the signature gingerbread flavor.
Gradually add dry ingredients to the wet mixture, stirring until a stiff dough forms. Divide the dough into manageable portions, wrap tightly in plastic, and refrigerate for at least three hours or overnight. Chilled dough rolls more easily and maintains cleaner edges during cutting.
Roll dough to one-quarter inch thickness on parchment paper. This measurement provides sufficient strength without creating overly heavy walls. Cut pieces using templates, remove excess dough, and bake at 350 degrees Fahrenheit for 12 to 15 minutes until edges appear firm and centers no longer look wet.
Construction Grade Gingerbread Recipe
Professional pastry chefs rely on construction-grade recipes for projects requiring exceptional stability. These formulas sacrifice some tenderness for superior structural performance, creating pieces that withstand extended display periods without warping or cracking.
This robust recipe uses higher flour ratios and includes corn syrup as a binding agent. Combine eight cups of all-purpose flour with one cup of bread flour for additional gluten structure. Add two tablespoons of ground ginger, one tablespoon of cinnamon, one teaspoon each of cloves and nutmeg, two teaspoons of baking soda, and one teaspoon of salt.
Mix two cups of shortening with two cups of granulated sugar until well combined. Add one cup each of corn syrup and molasses, then incorporate four eggs one at a time. The corn syrup creates an exceptionally hard surface that can be sanded or carved without crumbling.
This recipe yields enough dough for three medium houses or one large architectural project. The finished gingerbread becomes remarkably hard after cooling, making it ideal for multi-story structures or designs requiring internal supports. Professional builders appreciate how this formula maintains its shape during extended construction sessions.
Bake pieces at 350 degrees Fahrenheit for 15 to 18 minutes. Allow complete cooling before handling, as warm construction-grade gingerbread remains slightly pliable. Once cooled, these pieces become incredibly sturdy and resist breaking under normal assembly stress.
Oil Based Gingerbread House Recipe
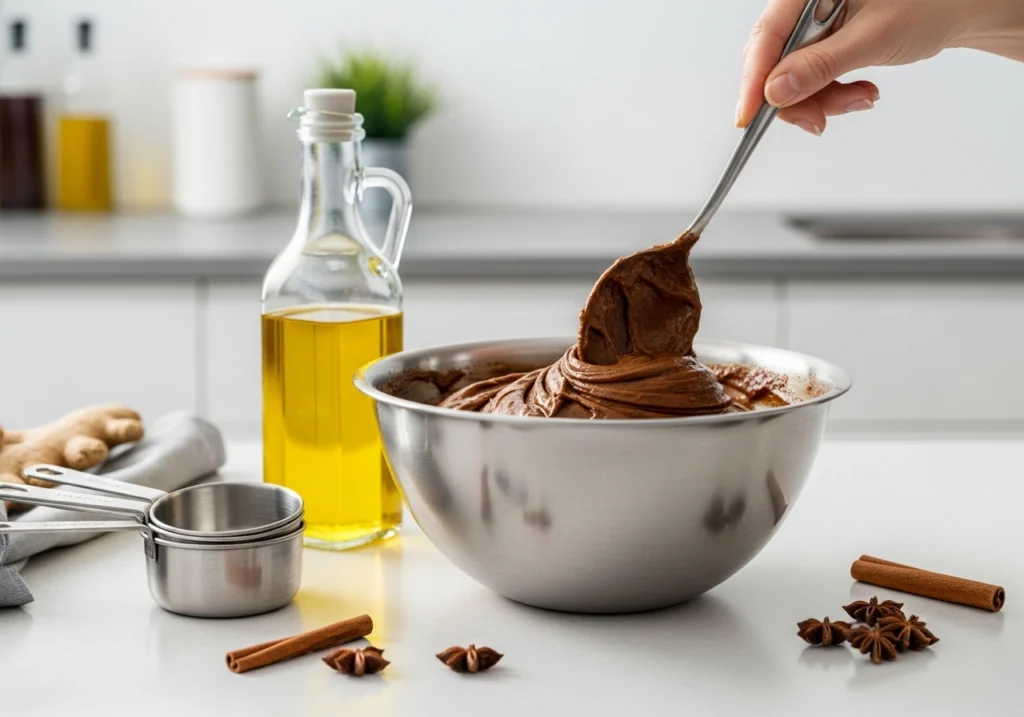
Oil-based recipes offer distinct advantages over butter formulations. The substitution of vegetable oil for butter creates dough that remains stable across wider temperature ranges, making it particularly valuable for extended decorating sessions or work in warmer environments.
Combine five cups of all-purpose flour with one tablespoon of baking powder, one tablespoon of ground ginger, two teaspoons of cinnamon, one teaspoon of ground cloves, and half a teaspoon of salt. Mix these dry ingredients thoroughly to ensure even spice distribution.
Whisk together one and a quarter cups of vegetable oil with one and a half cups of dark molasses, one cup of packed brown sugar, and two large eggs. The oil creates a looser initial texture compared to butter-based doughs, but proper chilling produces excellent rolling consistency.
Refrigerate the dough for at least three hours before rolling. Oil-based gingerbread requires slightly different handling than butter versions, but it offers extended working time and consistent properties throughout the building process. These characteristics prove especially valuable during complex assembly projects.
The finished gingerbread displays a slightly different texture while maintaining excellent structural integrity. Bakers who work in varying temperature conditions particularly appreciate oil-based recipes for their reliable performance regardless of environmental factors.
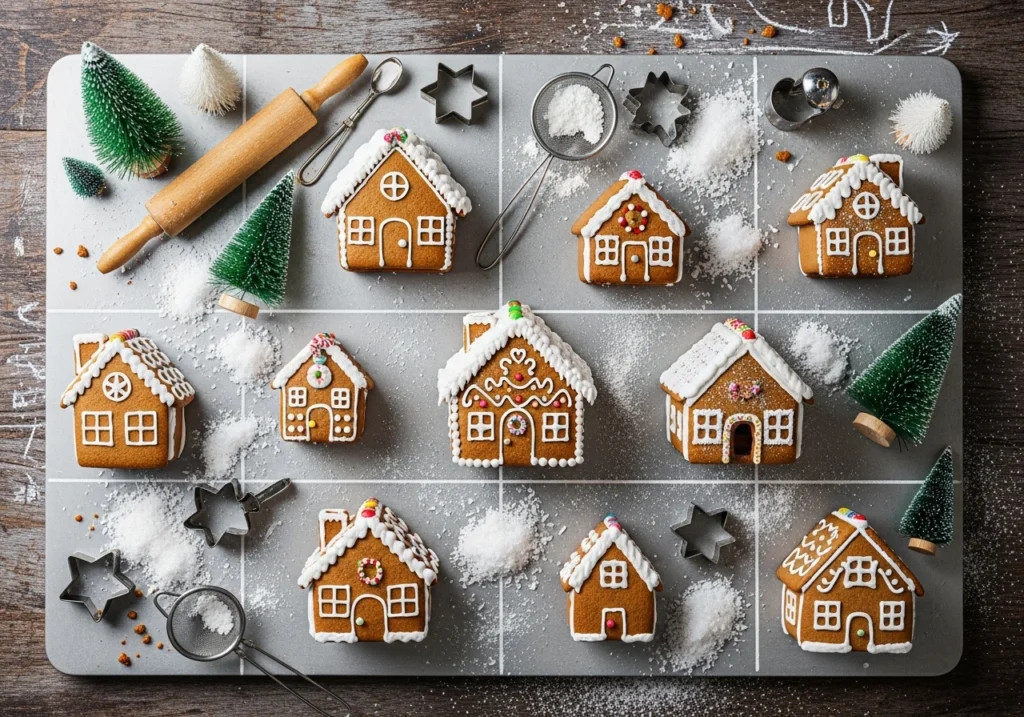
Mini Individual Gingerbread Houses

Individual-sized houses create charming personal creations perfect for party favors or place settings. These miniature structures require the same construction principles as full-sized houses but offer faster completion times and easier handling for younger builders.
Scale traditional recipes down by two-thirds, using four cups of all-purpose flour with corresponding reductions in other ingredients. This quantity produces six to eight small houses measuring approximately four inches square at the base.
Creating templates for mini houses demands attention to proportional relationships. Walls should measure roughly three inches tall with roof pieces cut to appropriate pitch angles. Use identical construction techniques as larger houses, working quickly during assembly as smaller pieces cool rapidly.
Mini houses excel as photography subjects because multiple structures can be arranged as villages or neighborhoods. Their manageable size makes them ideal for testing new decoration techniques before committing to larger projects. Children particularly enjoy decorating individual houses as the smaller canvas feels less overwhelming.
Consider creating themed mini house collections representing different architectural styles or historical periods. This approach transforms simple holiday decorations into educational opportunities while producing visually striking displays that photograph beautifully from multiple angles.
Gluten Free Gingerbread Recipe
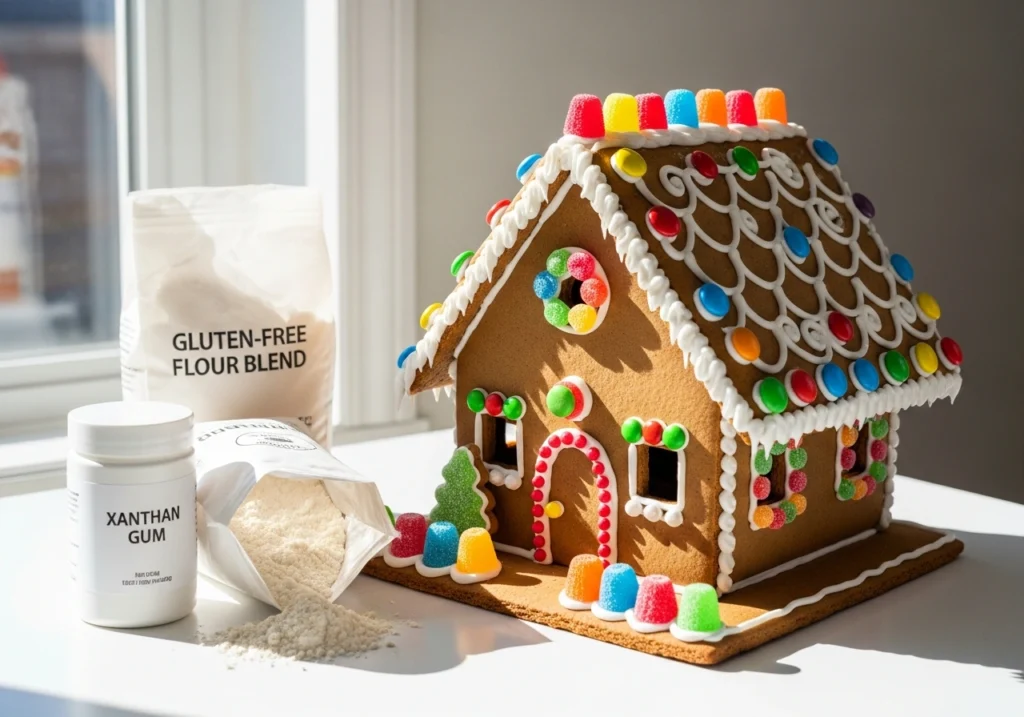
Dietary restrictions need not prevent participation in gingerbread traditions. Gluten-free formulations produce houses with comparable structural integrity and visual appeal to wheat-based versions when proper techniques are applied.
Use three and a half cups of gluten-free flour blend designed for baking. Ensure the blend contains xanthan gum or add one teaspoon separately for proper binding. Include one tablespoon of ground ginger, two teaspoons of cinnamon, one teaspoon of ground cloves, and one teaspoon of baking soda.
Cream three-quarters cup of butter with one cup of brown sugar until fluffy, then mix in one and a quarter cups of molasses and one large egg. Gluten-free dough typically requires less liquid than wheat-based versions as alternative flours absorb moisture differently.
Chill the dough for at least four hours or preferably overnight. Proper hydration improves rolling consistency and reduces crumbling during handling. Roll between sheets of parchment paper to prevent sticking and maintain even thickness.
Handle gluten-free gingerbread with extra care during assembly. The absence of gluten proteins creates more fragile structures that benefit from slightly thicker walls and generous royal icing applications. Despite requiring additional attention, gluten-free houses achieve identical visual results.
Vegan Gingerbread House Recipe
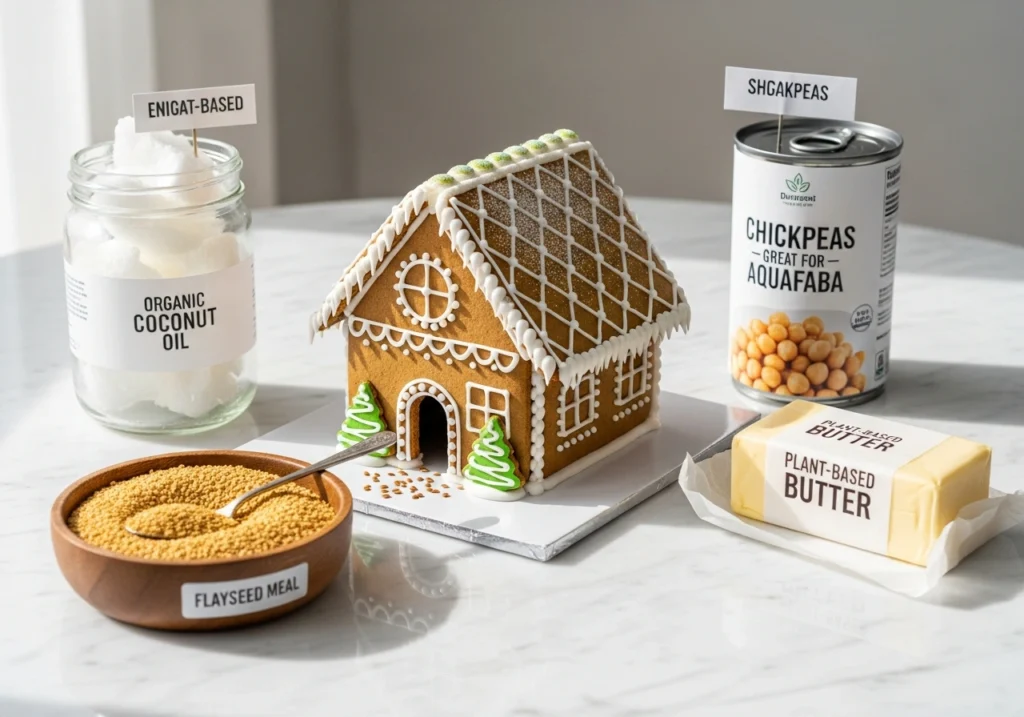
Plant-based bakers create impressive gingerbread houses using entirely dairy-free and egg-free ingredients. Thoughtful substitutions maintain structural integrity while accommodating vegan dietary preferences.
Replace butter with vegan butter or coconut oil using one-to-one ratios. Substitute eggs with flax eggs prepared by combining one tablespoon of ground flaxseed with three tablespoons of water for each egg required. Allow flax eggs to sit five minutes until gel-like before incorporating.
Use four cups of all-purpose flour, one tablespoon each of ground ginger and cinnamon, one teaspoon of ground cloves, one teaspoon of baking soda, and half a teaspoon of salt. Cream together one cup of vegan butter with one cup of brown sugar, then mix in one and a quarter cups of molasses and prepared flax eggs.
The dough may appear slightly different in texture but performs similarly during rolling and baking. Chill thoroughly before rolling to ensure clean edges and minimal spreading during baking. Bake at standard temperatures, monitoring carefully as vegan doughs sometimes brown slightly faster.
Vegan royal icing requires aquafaba as an egg white substitute. Whip half a cup of chickpea liquid until soft peaks form, then gradually add four cups of powdered sugar and one teaspoon of cream of tartar. This icing sets firmly enough for construction while remaining completely plant-based.
Chocolate Gingerbread House

Chocolate gingerbread offers dramatic visual impact as an alternative to traditional brown houses. The deep, dark color provides striking contrast with white royal icing and colorful candy decorations, creating modern aesthetic appeal.
Add three-quarters cup of Dutch-process cocoa powder to dry ingredients, reducing flour proportionally to maintain proper dough consistency. Combine four and a quarter cups of all-purpose flour with the cocoa, one tablespoon of ground ginger, two teaspoons of cinnamon, one teaspoon of baking soda, and half a teaspoon of salt.
The chocolate flavor complements traditional gingerbread spices beautifully, creating sophisticated taste profiles that adults particularly appreciate. The finished gingerbread displays deep, nearly black coloring that makes decorative elements visually pop.
Chocolate gingerbread photographs exceptionally well due to the high contrast between dark surfaces and light decorations. Light-colored candies and white icing create striking patterns against the dramatic background. Consider this recipe for contemporary designs where traditional aesthetics give way to bold graphic statements.
Bake chocolate gingerbread at slightly lower temperatures to prevent burning. Monitor pieces carefully as the dark color makes visual doneness assessment more challenging. Allow complete cooling before assembly to ensure pieces have hardened properly.
Honey Gingerbread Alternative
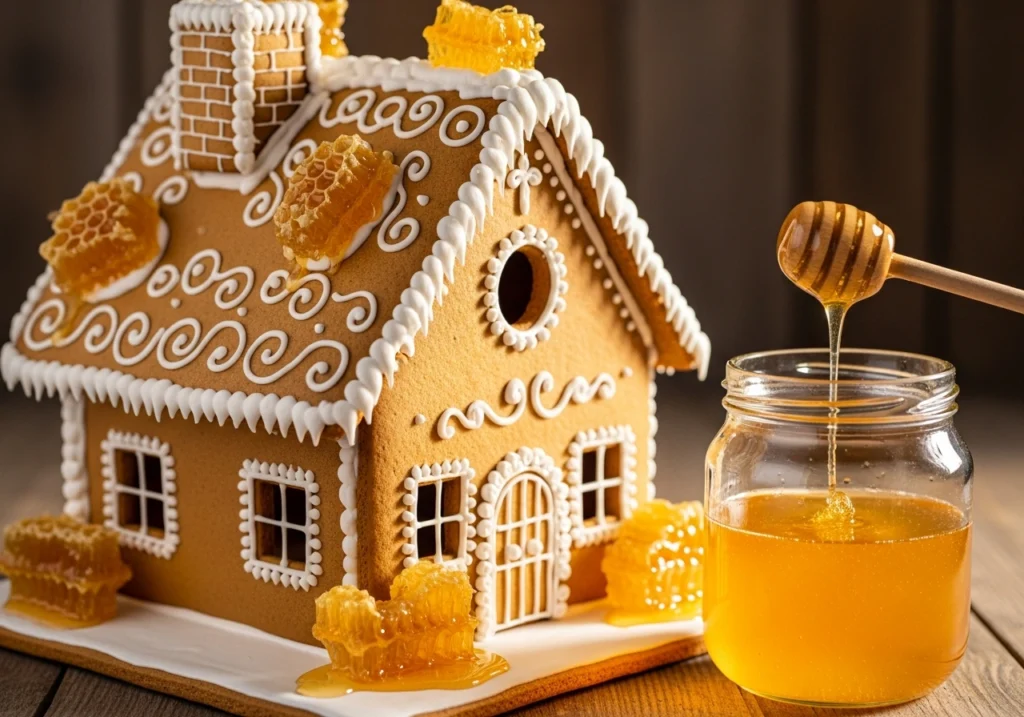
Honey provides lighter, more delicate flavor compared to traditional molasses-based recipes. This variation appeals to those preferring subtle sweetness and golden color over assertive molasses characteristics.
Replace molasses with equal amounts of honey, selecting mild varieties that complement rather than compete with traditional spices. Combine five cups of all-purpose flour with one tablespoon of ground ginger, two teaspoons of cinnamon, one teaspoon of ground cloves, one teaspoon of baking soda, and one teaspoon of salt.
Cream one cup of softened butter with one and a half cups of brown sugar until fluffy. Add one and a half cups of honey along with two eggs, mixing thoroughly. Honey’s lower viscosity compared to molasses may require minor flour adjustments to achieve proper rolling consistency.
The finished gingerbread displays warmer, golden-brown coloring compared to molasses versions. This lighter appearance works beautifully for springtime or non-traditional holiday themes. Some bakers appreciate honey’s subtle floral notes which add complexity without molasses assertiveness.
Honey gingerbread tends to brown faster during baking due to higher sugar content. Reduce oven temperature by 25 degrees and monitor carefully to prevent over-browning. The finished pieces offer mild flavor that pairs well with both traditional and contemporary decoration schemes.
Spiced Cardamom Gingerbread
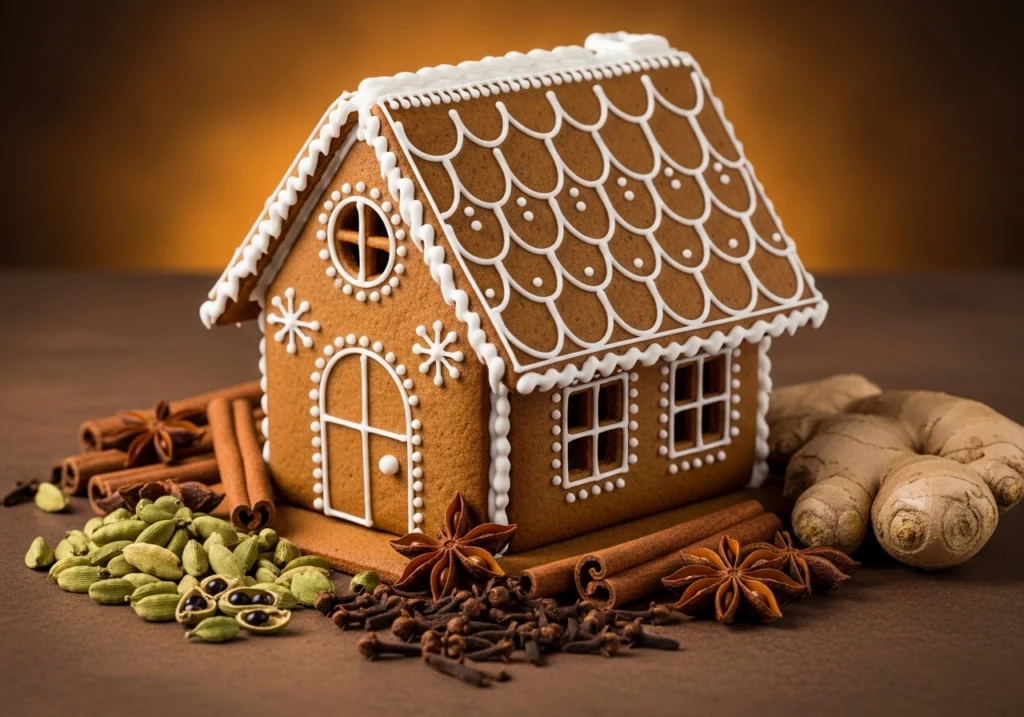
Elevating traditional recipes with sophisticated spice combinations creates memorable flavor profiles. This variation incorporates green cardamom for subtle, complex warmth that distinguishes it from standard gingerbread.
Combine five cups of all-purpose flour with one tablespoon of ground ginger, one tablespoon of ground cinnamon, one teaspoon of ground cardamom, half a teaspoon of ground cloves, one teaspoon of baking soda, and half a teaspoon of salt. Freshly ground cardamom pods provide more vibrant flavor than pre-ground versions.
Cardamom’s distinctive floral notes complement traditional gingerbread spices without overwhelming them. Adjust the amount based on personal preference, increasing for more pronounced flavor or decreasing for subtlety. This recipe produces gingerbread with exceptional aromatic qualities that fill kitchens with inviting scents.
The enhanced spice profile makes pieces more appealing for consumption after display periods conclude, though structural integrity remains the primary focus. Consider this variation when building houses intended for eating rather than purely decorative purposes.
Bake at standard temperatures, allowing complete cooling before assembly. The cardamom aroma intensifies during baking, creating an olfactory experience that enhances the entire construction process. Store finished pieces in airtight containers to preserve the delicate spice notes.
Graham Cracker House Alternative
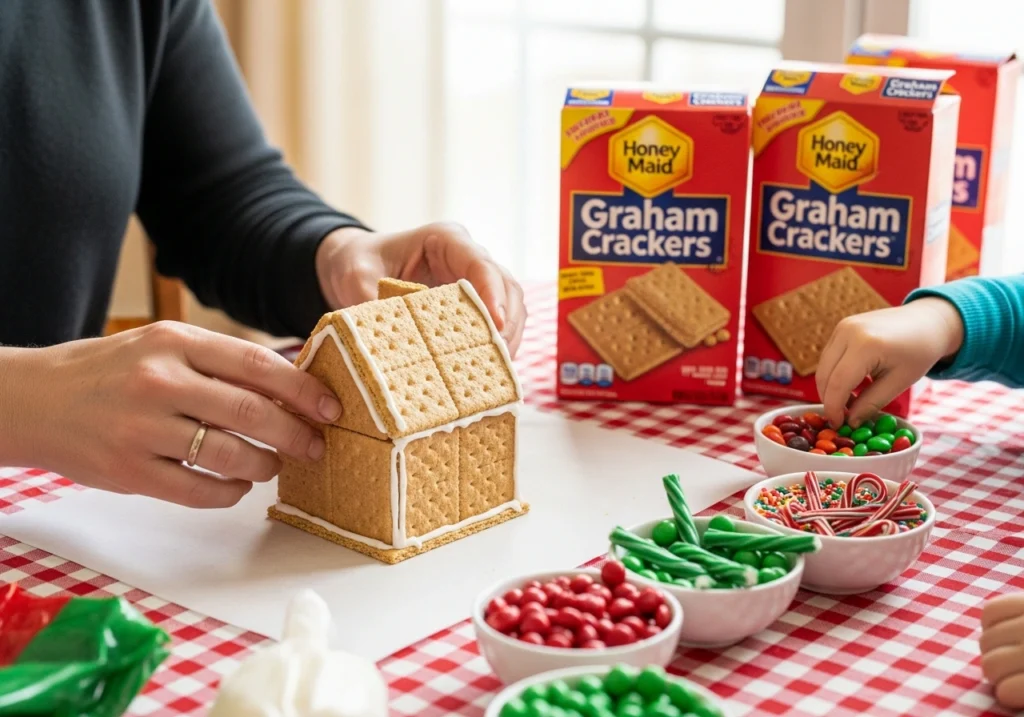
Time constraints sometimes prohibit traditional gingerbread preparation. Graham crackers provide accessible alternatives with similar construction properties and significantly reduced preparation time.
While not technically gingerbread, graham crackers offer uniform size and shape that simplify template creation and assembly. Select plain varieties rather than flavored options to maintain neutral taste profiles that complement candy decorations.
Use standard royal icing as construction adhesive, applying generous amounts along joining edges to ensure stability. The crackers’ consistent dimensions eliminate rolling and cutting steps, making this approach ideal for young children or beginners.
Graham cracker houses work wonderfully for casual family activities or classroom projects where process matters more than architectural perfection. Decorating remains the primary focus, allowing creative expression without the pressure of creating flawless gingerbread pieces.
Consider graham cracker construction when planning large group activities where providing pre-baked gingerbread for all participants becomes impractical. The simplified approach maintains the spirit of gingerbread house building while accommodating time and resource constraints.
Sugar Glass Window Gingerbread

Creating transparent windows transforms ordinary houses into illuminated masterpieces. This advanced technique requires precision but produces spectacular results, especially when houses contain internal lighting.
Cut window openings in wall pieces before baking. After baking and cooling, fill spaces with crushed hard candies or specially prepared sugar glass. For sugar glass, boil two cups of granulated sugar with one cup of water and half a cup of corn syrup until reaching hard crack stage at 300 degrees Fahrenheit.
Pour hot sugar mixture carefully into window openings on cooled gingerbread pieces placed on parchment-lined sheets. The sugar spreads to fill spaces, creating clear panes once cooled. This technique requires caution due to extremely high temperatures involved.
Sugar glass windows create dramatic photographic opportunities, especially when houses contain battery-operated LED lights. Glowing windows suggest warmth and welcome, adding emotional depth to images. Position lights carefully to avoid creating hot spots or harsh shadows.
Consider color additions to sugar glass for stained glass effects. Add gel food coloring to molten sugar before pouring, creating jewel-toned windows that catch and refract light beautifully. Multiple colors can be layered for complex designs.
Lemon Myrtle Australian Style
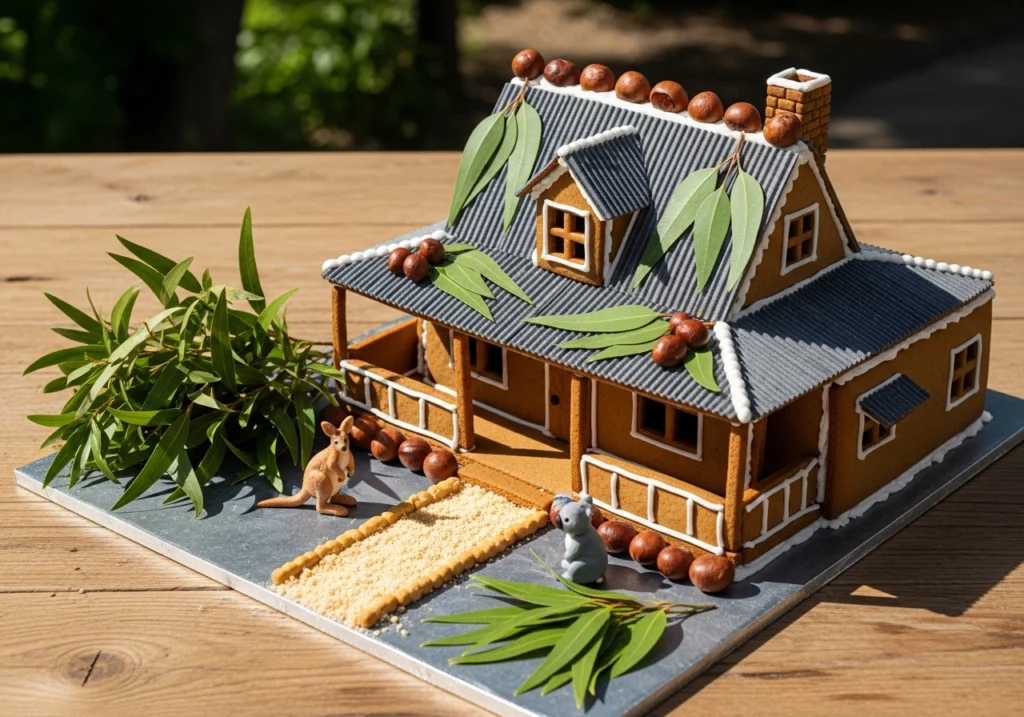
Australian bakers incorporate native ingredients into gingerbread traditions. Lemon myrtle provides citrus notes that brighten traditional spice blends, creating refreshing interpretations of classic recipes.
Add two tablespoons of finely ground dried lemon myrtle leaves to dry ingredients along with standard gingerbread spices. The herb’s intense lemon fragrance complements ginger and cinnamon beautifully, creating unexpected yet harmonious flavor profiles.
This variation works particularly well for summer holiday celebrations in the Southern Hemisphere where traditional heavy spices may feel less appropriate. The lighter, brighter flavor profile suits warmer weather while maintaining gingerbread construction properties.
Styling Australian-themed houses might incorporate native elements like sugar eucalyptus leaves or representations of iconic Australian architecture. This approach celebrates regional traditions while maintaining the fundamental joy of gingerbread construction shared across cultures.
Grind lemon myrtle leaves finely before incorporating to ensure even distribution throughout the dough. The herb’s potency means a little goes a long way, so start conservatively and adjust in future batches based on preference.
Naturally Colored Gingerbread
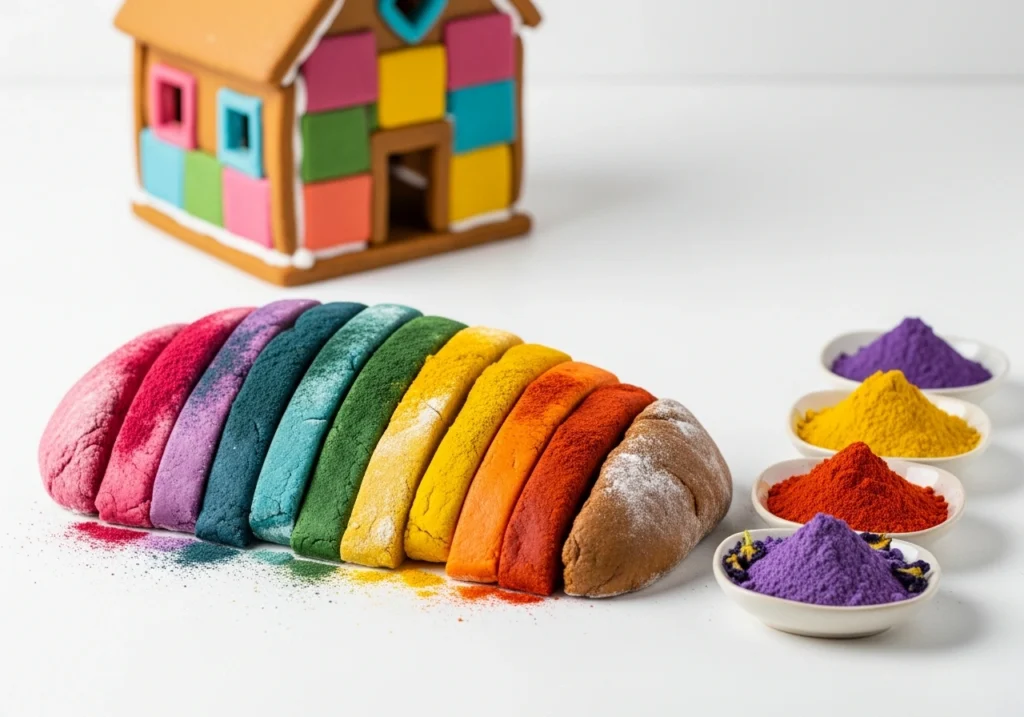
Creating colored gingerbread dough allows creative architectural possibilities beyond traditional brown. Natural food colorings provide visual interest without artificial ingredients, appealing to health-conscious bakers.
Divide basic gingerbread dough into portions, adding natural coloring to achieve desired hues. Beet powder creates pink or red tones, spirulina produces green, and turmeric yields golden yellow. Use one to two tablespoons of powder per cup of dough.
Natural colorants provide visual interest though colors may appear more muted than synthetic alternatives. This trade-off appeals to those prioritizing clean ingredient lists. Expect slight flavor changes depending on coloring agents used, though most remain subtle enough to avoid significantly altering gingerbread taste.
Knead coloring thoroughly into dough portions to ensure even distribution. Natural colors may fade slightly during baking, so expect finished pieces to appear lighter than raw dough. This characteristic should be considered when planning color schemes.
Photographing naturally colored gingerbread requires attention to lighting as earth-toned hues can appear muddy in harsh conditions. Soft, diffused natural light or carefully positioned artificial lighting brings out the beauty of subtle color variations.
Royal Icing for Construction
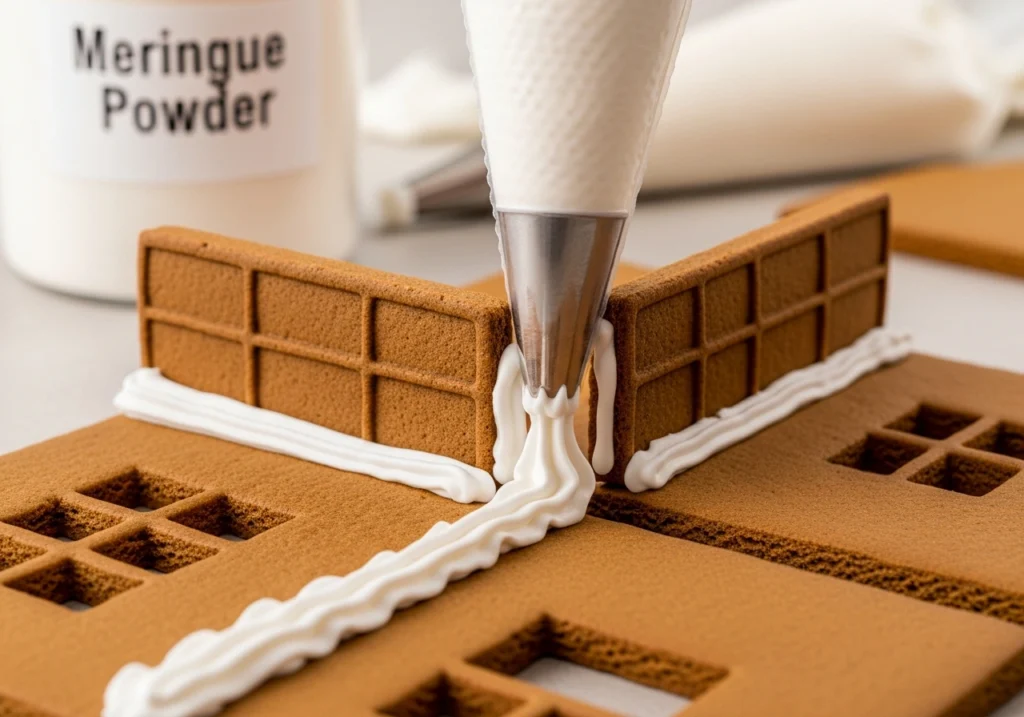
Perfect royal icing serves dual purposes as construction adhesive and decorative medium. Mastering this essential component ensures structural stability while enabling intricate decoration.
Combine four cups of powdered sugar with three tablespoons of meringue powder and five to six tablespoons of water. Beat on medium speed for seven to ten minutes until stiff peaks form. The icing should hold its shape firmly without drooping.
Adjust consistency based on intended use. Construction icing requires stiff peaks that set quickly and support structural weight. Decorative piping benefits from slightly softer consistency that flows smoothly through tips while maintaining defined shapes.
Color royal icing using gel food coloring rather than liquid varieties which alter consistency unpredictably. Prepare multiple batches in various colors, storing them in covered bowls with damp towels preventing surface crusting.
Properly made royal icing sets completely within several hours, creating rock-hard bonds that last indefinitely when protected from moisture. Store finished houses in cool, dry locations away from humidity that can soften icing over time.
Photography Lighting Techniques
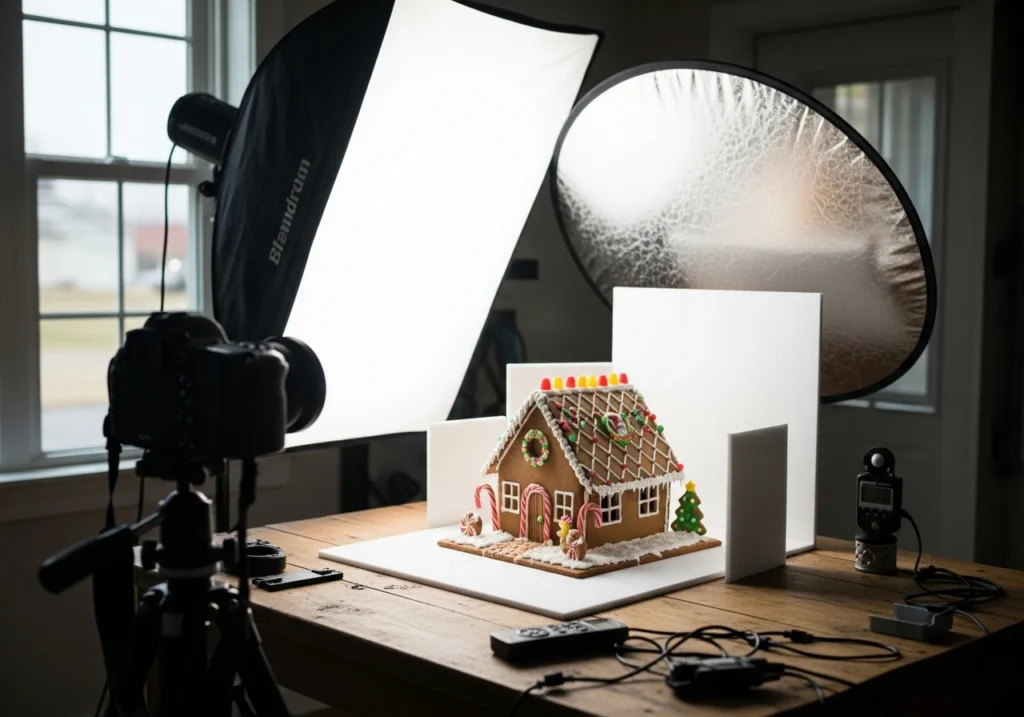
Transforming gingerbread houses into compelling photographic subjects requires understanding fundamental lighting principles. Proper illumination enhances texture and detail while creating mood and atmosphere.
Natural window light provides soft, flattering illumination that highlights architectural features without harsh shadows. Position houses perpendicular to windows, using white foam core boards as reflectors to fill shadows on opposite sides.
For evening or windowless photography, continuous lighting or speedlights diffused through softboxes create controlled illumination. Avoid direct flash which creates harsh highlights and deep shadows that flatten three-dimensional structures.
Consider backlighting for dramatic effects, especially with sugar glass windows. Position lights behind or inside houses to create glowing effects that suggest warmth and welcome. Balance backlight with fill light to maintain detail in shadowed areas.
Experiment with various light temperatures to create different moods. Warm tungsten lighting suggests cozy evening scenes while cooler daylight temperatures evoke crisp winter mornings. Match light temperature to the narrative your images convey.
Composition and Styling Methods
Professional styling elevates gingerbread photography beyond simple documentation. Thoughtful composition and prop selection create images that tell stories and evoke emotional responses.
Apply the rule of thirds by positioning primary subjects along imaginary lines dividing frames into thirds both horizontally and vertically. This technique creates more dynamic, visually interesting images compared to centered compositions.
Select backgrounds that complement rather than compete with subjects. White poster board creates clean backdrops for modern minimalist approaches while weathered wood suggests rustic charm. Artificial snow or powdered sugar adds winter atmosphere.
Props and styling elements provide context without overwhelming primary subjects. Scatter candy decorations casually to suggest ongoing construction. Position miniature baking tools to reinforce handmade narratives. Keep styling intentional and minimal.
Shoot from slightly above eye level to capture roof details while maintaining architectural perspective. Vary angles throughout photo sessions to provide diverse images showing different aspects of your creations.
Decorating Themes and Color Schemes

Selecting cohesive decorating themes elevates houses from haphazard candy collections to intentional design statements. Planned color schemes and consistent styling create visual harmony and professional appearance.
Traditional red and white Christmas themes remain perennially popular, featuring peppermint candies, red hots, and white royal icing resembling fresh snow. This classic approach satisfies nostalgia while allowing personal creativity within established parameters.
Modern minimalist themes embrace restrained palettes and geometric patterns. White icing dominates with sparse accents in metallics or single colors. Clean aesthetics appeal to contemporary sensibilities while highlighting architectural lines.
Whimsical candy land themes explode with color and texture, incorporating gummy bears, jelly beans, chocolate bars, and unlimited sweets. The maximalist approach celebrates abundance and joy, particularly resonating with children.
Nature-inspired themes draw from forest, garden, or winter landscape imagery. Pretzel stick log cabins feature nuts and seeds as decorative elements. Shredded coconut becomes snow while rosemary sprigs transform into evergreen trees.
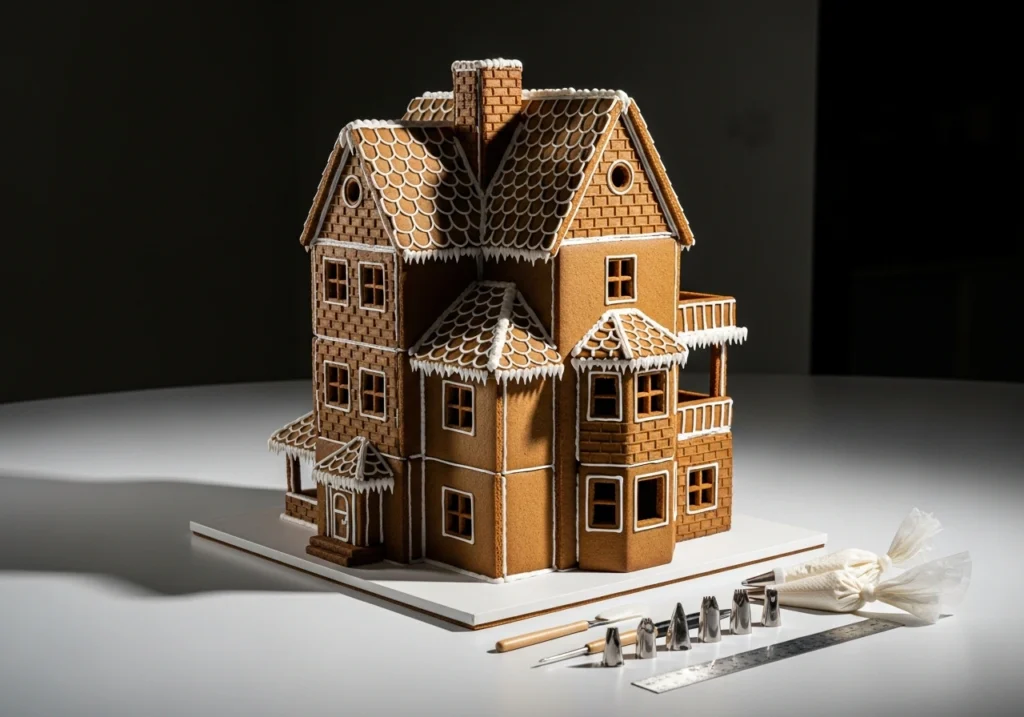
Advanced Construction Techniques

Mastering advanced techniques elevates houses from simple structures to architectural achievements. Internal supports, proper weight distribution, and specialized methods enable ambitious projects.
Creating multi-story buildings requires internal supports distributing weight properly. Cut additional gingerbread pieces as vertical braces, positioning them strategically to bear loads without showing through windows.
Attaching roof pieces challenges many builders as gravity works against desired angles during drying. Construct temporary supports using cans, boxes, or aluminum foil props that hold panels at proper angles while icing sets.
Creating curved walls or unconventional shapes demands specialized approaches. Bake gingerbread slightly underdone, then carefully press warm pieces into or over forms. Pliable gingerbread holds new shapes as it cools and finishes drying.
Allow adequate drying time between construction stages. Royal icing requires several hours to achieve full strength, particularly when bearing significant weight. Patience produces stronger, more stable structures than rushing assembly.
Troubleshooting Common Problems
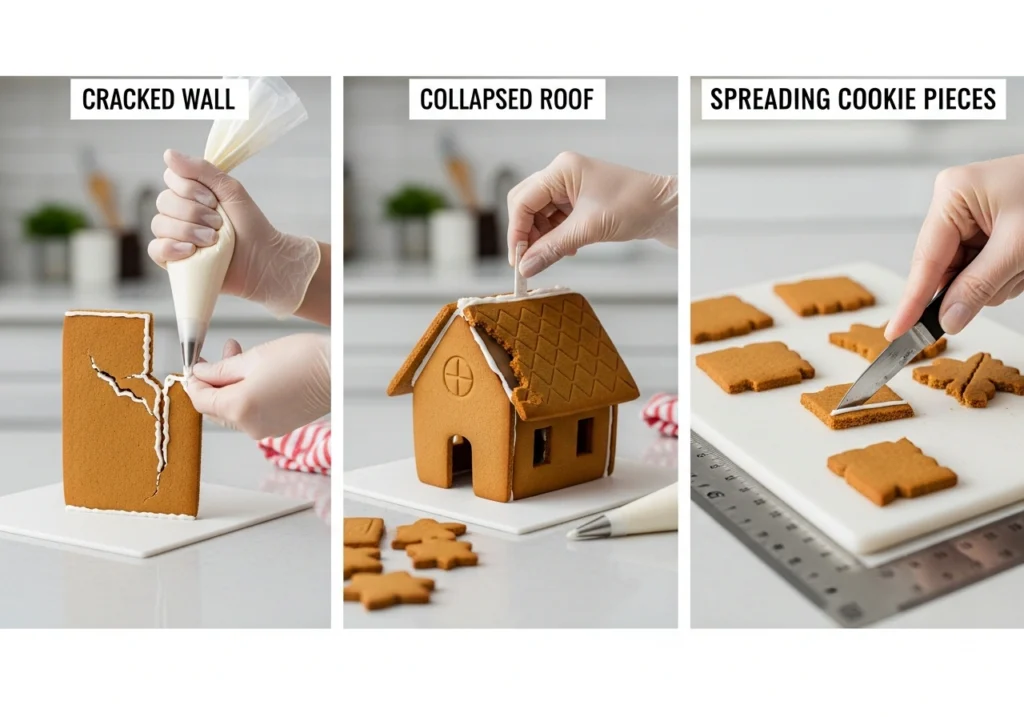
Even experienced bakers encounter construction challenges requiring problem-solving skills. Understanding common issues and their solutions prevents frustration and ensures successful outcomes.
Gingerbread pieces that spread during baking indicate insufficient chilling before cutting or oven temperatures running too high. Remedy spread pieces by carefully trimming warm gingerbread immediately after removing from oven.
Houses that collapse during assembly usually suffer from inadequate drying time between construction stages. Work in stages over multiple days, allowing each wall to set completely before adding additional pieces.
Icing that refuses to set properly may contain too much liquid or insufficient meringue powder. Remake batches using precise measurements rather than attempting to salvage compromised icing. Humidity affects royal icing significantly.
Candy decorations that slide off walls indicate icing applied too thinly or decorations attached before icing developed adequate tack. Apply generous royal icing behind heavy decorations, holding pieces momentarily to allow initial set.
Preservation and Display Strategies
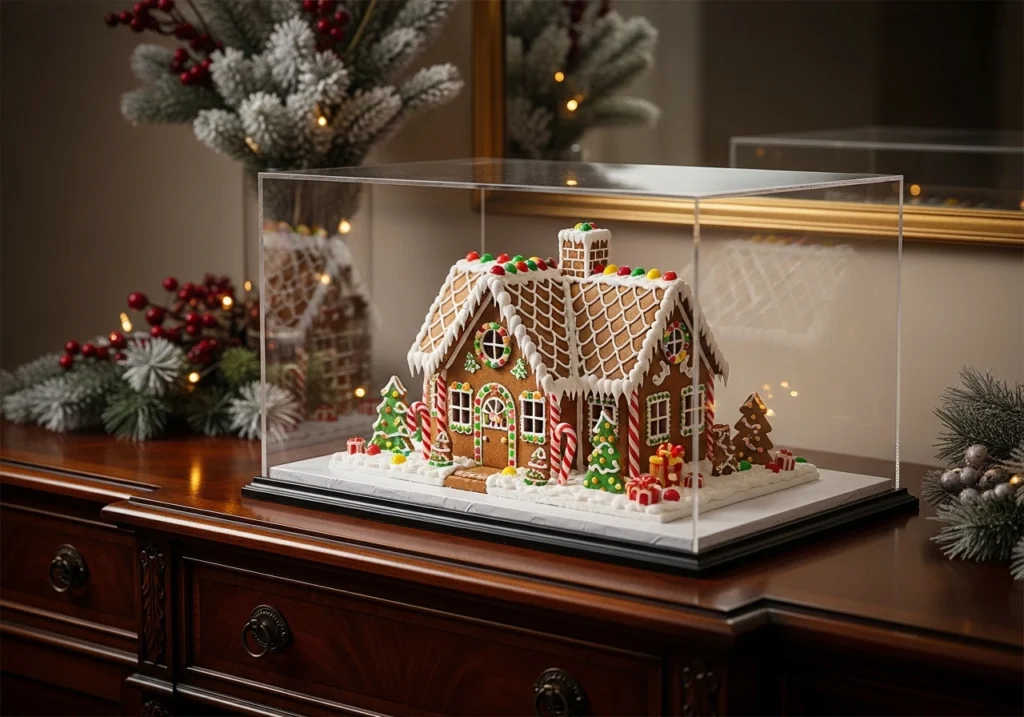
Properly preserved houses remain display-worthy throughout entire holiday seasons and beyond. Understanding storage and maintenance techniques ensures your creations stay beautiful.
Store finished houses in cool, dry environments away from direct sunlight which fades colors and softens structural elements. Avoid refrigeration as temperature fluctuations create condensation compromising royal icing and gingerbread integrity.
Dust accumulation poses inevitable challenges for houses displayed over extended periods. Gently blow away surface dust using compressed air cans designed for electronics cleaning, held at appropriate distances.
Consider transparent display cases for elaborate houses deserving protection from handling or environmental factors. Glass or acrylic cases preserve houses while allowing full visibility from all angles.
Eventually even carefully maintained houses must face disposal. Rather than simply discarding creations, photograph thoroughly from multiple angles before disassembly. These images preserve memories while allowing edible artwork to fulfill its ultimate purpose.
Creating gingerbread houses combines technical baking skills with artistic vision, resulting in edible architecture that delights across generations. Whether constructing traditional cottages or avant-garde interpretations, fundamental principles of proper dough preparation, patient assembly, and thoughtful decoration remain constant. Mastering these techniques transforms annual holiday activities into accomplished crafts worthy of photographic documentation and proud display throughout festive seasons. The fifteen recipes presented offer starting points for exploration, while styling and photography guidance ensures your creations receive the visual treatment they deserve. Each house built adds to personal traditions while developing skills that improve year after year.
Frequently Asked Questions
How long does a gingerbread house typically last?
Properly constructed gingerbread houses remain structurally sound for several weeks or even months when stored in cool, dry conditions away from moisture. Royal icing sets completely hard, creating durable bonds between pieces. However, candy decorations may fade or become stale over time, and the gingerbread itself becomes quite hard after extended display. Most builders keep houses throughout December and disassemble them after New Year’s Day. While technically safe to eat if kept dry, the gingerbread is generally not enjoyable after such long display periods.
Can gingerbread house dough be prepared ahead of time?
Yes, gingerbread dough benefits significantly from advance preparation. Wrap tightly in plastic and refrigerate for up to one week, or freeze for up to three months. Frozen dough should thaw overnight in the refrigerator before rolling. Chilling actually improves dough handling characteristics as flour fully hydrates and flavors meld together. Many experienced builders prepare dough several days before construction, baking pieces when convenient and assembling when ready to decorate.
What type of icing works best for holding gingerbread houses together?
Royal icing made from meringue powder, powdered sugar, and water provides the strongest adhesive properties for gingerbread construction. This mixture dries completely hard, creating bonds strong enough to support significant weight. The icing acts essentially like cement, holding pieces together indefinitely when protected from moisture. Some professional builders supplement royal icing with melted sugar for additional reinforcement on large structures, though this technique requires careful handling due to extremely high temperatures involved.
How can I prevent my gingerbread pieces from breaking?
Roll dough to consistent quarter-inch thickness to balance strength with weight. Bake pieces until completely firm without overbaking, which creates brittleness. Handle cooled pieces carefully, supporting from underneath rather than grasping edges which are most vulnerable to breaking. During assembly, work on stable, level surfaces and allow adequate drying time between construction stages. If pieces do crack, repair them with thick royal icing which can effectively bridge small gaps and restore structural integrity.
What are the easiest decorations for beginners to use?
Simple candy decorations require no special skills while creating impressive visual impact. Peppermint candies, candy canes, gumdrops, and chocolate chips attach easily with royal icing dots. Pretzel squares or sticks make excellent roof shingles requiring minimal precision. Powdered sugar dusted over completed houses creates instant snow effects. Focus on covering surfaces completely rather than attempting intricate details which come with experience. Let children choose their favorite candies and arrange them creatively for personalized results that celebrate individual expression.

![boho patio décor trends]](https://modernhavenliving.com/wp-content/uploads/2025/11/10-Boho-Patio-Decor-Trends-for-Small-Outdoor-Spaces-2025-Guide_26-768x768.webp)


One Comment