
18 Creative DIY Advent Calendar Ideas for a Handmade Countdown
A handmade advent calendar makes December feel special from the very first morning. Instead of a store bought box that is gone in a few weeks, a DIY advent calendar can hold notes, tiny treats, small toys, or family activities, and it can come back out year after year. It also doubles as Christmas decor, adding color and personality to a wall, a mantel, or a shelf.
You do not need expensive supplies or advanced crafting skills to make a beautiful countdown. Everyday items such as paper bags, envelopes, toilet paper rolls, fabric scraps, mason jars, and a muffin tin can become a festive display with a little imagination. Start in early November so the calendar is ready by December 1, and choose a style that fits your home, your time, and the people who will open it.
The ideas below include quick paper projects, reusable fabric calendars, and keepsake displays for kids and adults. Most use 24 numbered spaces for December 1 through Christmas Eve, with an optional 25th space for Christmas Day. Pick one idea, gather your supplies, and enjoy making a countdown your family will remember.
1. Kraft Paper Bags Clipped to Twine
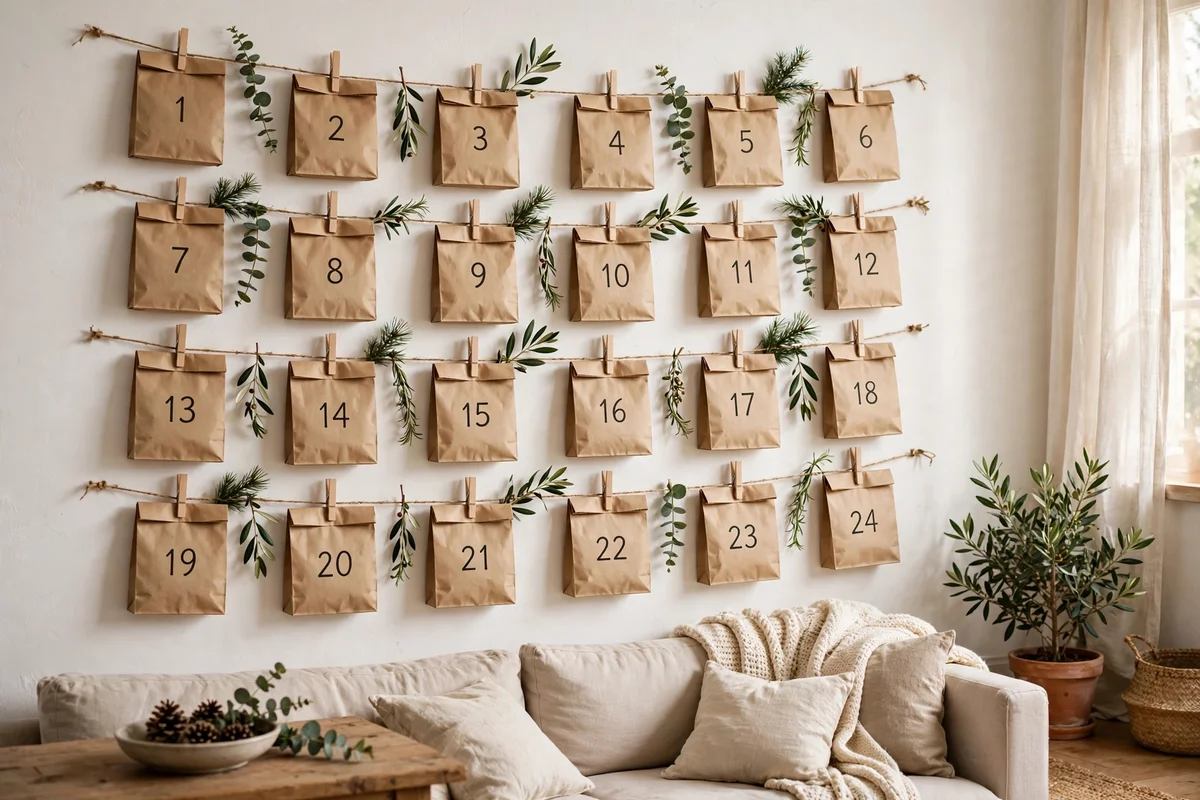
Number 24 small kraft paper bags from 1 to 24, fill each one with a treat, a note, or a small toy, and clip them to two or three lengths of twine hung on a wall. Use wooden clothespins to hold the bags, and tuck in a few sprigs of greenery for a festive touch. This project takes an evening, it costs very little, and it looks warm and handmade.
Arrange the bags in neat rows, or shape the twine into a tree on the wall for extra charm. Keep heavier treats in the lower rows so the twine does not sag. When December ends, save the bags and clothespins, and reuse them next year with new fillings. This is one of the easiest DIY advent calendar ideas, and it suits almost any home.
2. Numbered Envelopes on a Board

Fill 24 kraft or colored envelopes with activity cards, jokes, or little messages, number each one, and pin them to a corkboard, a wooden board, or a large piece of foam board. Arrange them in a grid, a tree shape, or a simple scattered pattern. Add a ribbon border or a small garland across the top for decoration.
This calendar is perfect for families who want activities instead of treats. Write one simple activity inside each envelope, such as baking cookies, reading a Christmas story, or taking a walk to see holiday lights. Put longer outings on weekend days when you have more time. The board can lean on a mantel or hang on a wall, and it stores flat after Christmas.
3. A Felt Pocket Wall Hanging

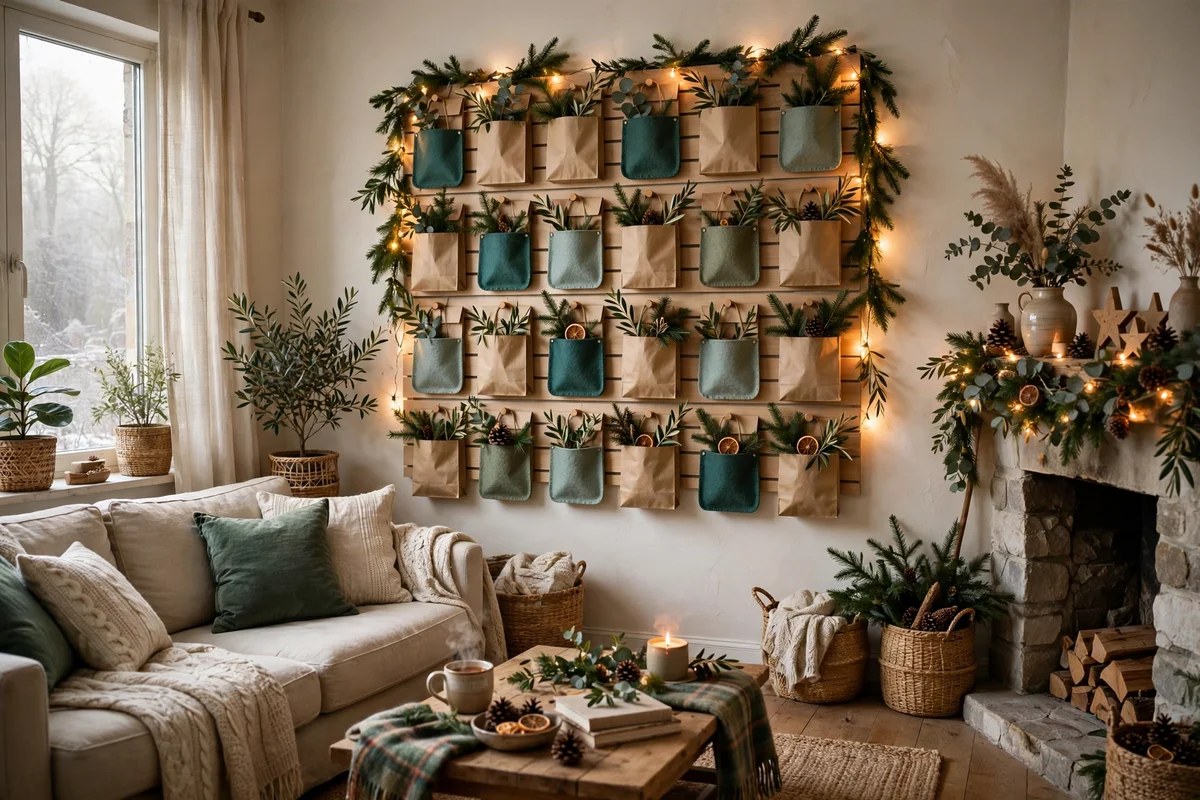
Sew or glue 24 small felt pockets onto a large felt backing panel, add a dowel at the top and a loop of ribbon for hanging, and number each pocket with felt numbers or wooden discs. Felt is forgiving for beginners, because it does not fray, it holds its shape, and the pockets keep their form.
Fill each pocket with a small treat, a note, or a tiny ornament. This calendar is reusable for many years, it stores flat, and children love reaching into a pocket each morning. Choose classic Christmas colors such as red, green, and cream, or a soft neutral palette that matches your decor. A felt wall hanging also makes a thoughtful handmade gift for a family with young children.
4. Mason Jars Hung on a Wooden Ladder
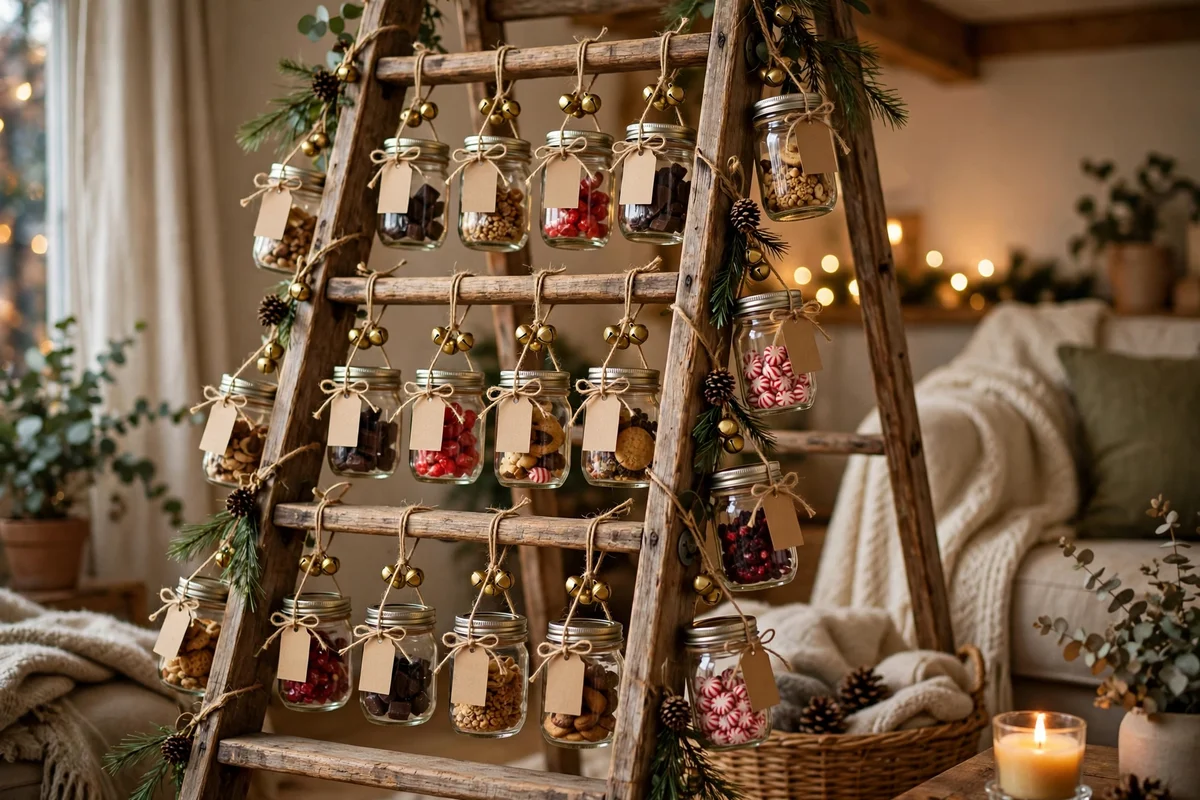
Hang 24 small mason jars from the rungs of a leaning wooden blanket ladder, each one tagged with a number and tied with twine and a small jingle bell. Fill the jars with foil wrapped chocolates, candy canes, tiny ornaments, or handwritten notes. The glass shows the treats inside, so the countdown becomes part of the decoration.
Lean the ladder safely against a wall, and make sure it is stable before children reach for the jars. Use small jars to keep the weight light, and place heavier items in the lower rungs. This calendar suits a farmhouse or rustic home, and it looks beautiful beside a fireplace or in an entryway. After Christmas, use the jars for storage or for next year’s calendar.
5. A Muffin Tin with Decorative Paper Lids

A muffin tin makes a surprisingly practical advent calendar, because each cup is already the right size for a small treat. Fill 24 cups with chocolates, small toys, or notes, cover each cup with a circle of decorative paper, and write a number on each lid. Use a standard 12 cup tin twice, or two tins side by side.
Children love lifting the paper lids to find the surprise underneath. Use washi tape to hold the lids in place, and choose paper in a mix of Christmas patterns. This project takes under an hour, it uses a kitchen item you already own, and it is easy to refill next year. Place the tin on a kitchen counter or a dining table where everyone can reach it each morning.
6. Toilet Paper Roll Wreath

Save 24 empty toilet paper rolls and turn them into a wreath shaped advent calendar. Wrap each roll in colorful crepe paper, leaving extra paper at both ends, and twist the ends like a candy wrapper. Fill each roll with a small treat, glue the rolls into a circle, and hang the wreath on a wall or a door.
This project is fun to make with children, and it reuses materials that would otherwise be recycled. Use a mix of red, green, gold, and cream paper for a festive look, and number each roll with a sticker or a marker. Hang the wreath securely, and let each child take one roll per day. The wreath looks cheerful, it costs almost nothing, and it is a great way to start a handmade tradition.
7. Mini Stockings on a Branch Tree

Hang 24 mini stockings from a bare branch set in a vase, or from a small wall mounted branch tree. Use felt, fabric scraps, or old sweaters to make the stockings, and number each one with a tag. Fill them with small treats, coins, or notes, and let the branch become a natural, rustic display.
This calendar suits a home with a simple, natural Christmas style. Choose stockings in a mix of red, cream, and green, or make them all from one fabric for a calmer look. Secure the branch firmly in a heavy vase filled with stones or sand, and keep it away from high traffic areas. After Christmas, pack the stockings away and reuse the branch next year.
8. A Paper Chain Countdown

Cut 24 strips of colored paper, write a simple activity or a small treat on the inside of each strip, number the outside, and link them into a chain. Hang the chain on a wall, a mantel, or a doorway, and remove one link each day in December. The chain gets shorter as Christmas gets closer, which children find very satisfying.
This is the simplest DIY advent calendar idea, and it takes only paper, scissors, and tape or a stapler. Use Christmas colors, or let children decorate each strip with drawings and stickers. Keep the activities simple, such as drinking hot cocoa, singing a Christmas song, or making a paper snowflake. A paper chain is light, cheap, and easy to store flat for next year.
9. Small Muslin Bags on a Weathered Board

Tie 24 small muslin bags to a weathered wooden board, a piece of driftwood, or a reclaimed plank. Number each bag with a tag, fill it with a treat or a note, and hang the board on a wall or lean it on a mantel. The natural fabric and wood create a calm, rustic look that suits a farmhouse home.
Muslin bags are inexpensive, reusable, and easy to fill. Use twine to tie them to small nails or hooks on the board, and vary the bag heights slightly for a relaxed, handmade feel. Add a few sprigs of greenery at the top of the board for a festive touch. This calendar stores easily, and the bags can be washed and reused year after year.
10. A Christmas Village with Numbered Houses

Build a small Christmas village from cardboard, wood, or paper, with 24 tiny houses, shops, or cottages. Number each building, hide a small treat or note inside, and arrange the village on a mantel, a shelf, or a tabletop. Add fake snow, tiny trees, and battery fairy lights for a magical scene.
This calendar takes more time than a paper project, but it becomes a keepsake your family will love. Use small cardboard boxes, paint them in soft Christmas colors, and cut a small door or roof flap for each day. Children will look forward to opening a new house each morning. After Christmas, pack the village carefully and bring it out again next year.
11. Clothespin Calendar on a String
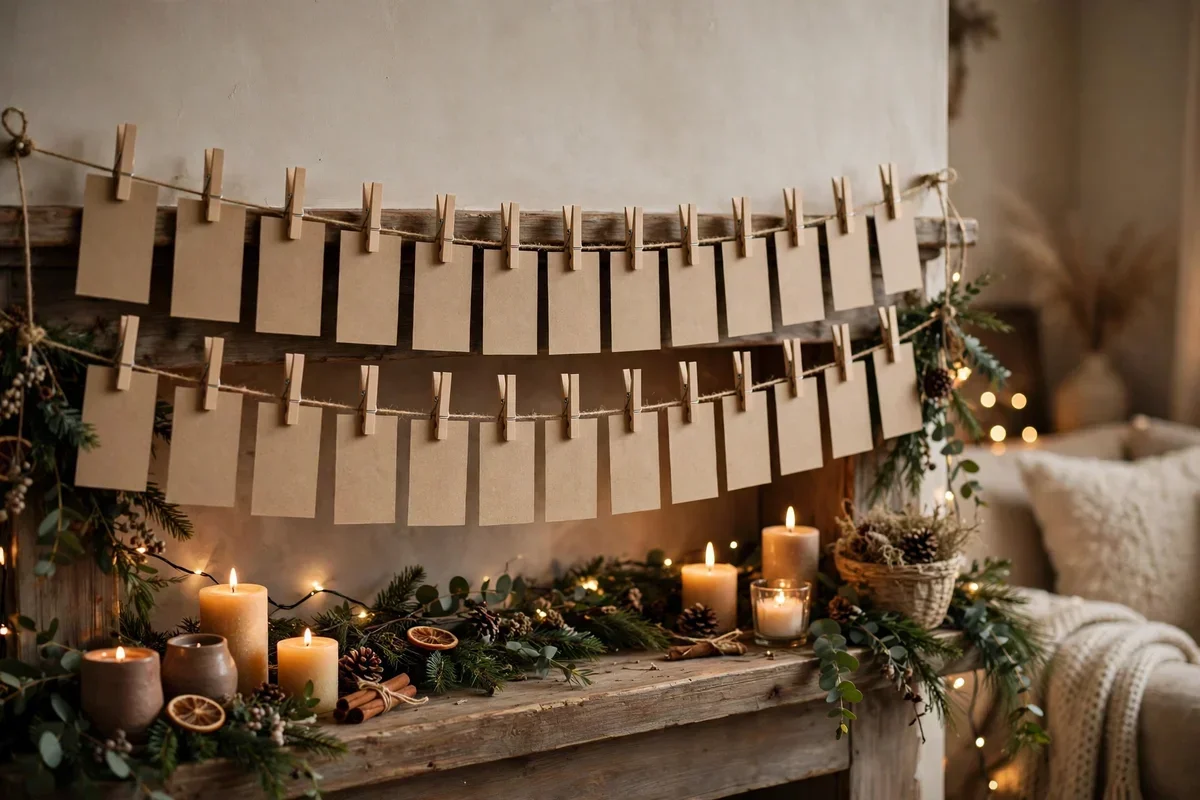
Clip 24 small numbered cards, envelopes, or paper bags to a length of twine or ribbon using wooden clothespins. Hang the string across a mantel, a window, or a wall, and let each day’s card hang in order. Fill the envelopes with notes, activities, or small flat treats such as stickers or temporary tattoos.
This project is quick, cheap, and easy to customize. Use kraft cards for a natural look, or colorful cards for a cheerful one. Decorate the clothespins with paint, washi tape, or small stickers. The string calendar works well in a small home, because it takes up very little space and can be hung almost anywhere. Take it down after Christmas, and store the cards and pins in a bag for next year.
12. A Book Advent Calendar

Wrap 24 Christmas books, one for each day in December, in kraft paper or festive paper, number each package, and stack them in a basket or on a shelf. Each night, open one book and read it together as a family. This calendar builds a lovely bedtime tradition, and it encourages reading during the holiday season.
Choose a mix of new and favorite books, including picture books, stories, and holiday classics from your own shelves. Wrap them simply so the unwrapping is part of the fun. For older children or adults, use short stories, poems, or small puzzle books. After Christmas, keep the books on a shelf and reuse the same set next year, or swap a few new titles in each December.
13. Recycled Tin Cans with Paper Lids

Clean and paint 24 small tin cans, fill each one with a treat or a small toy, and cover the top with a circle of decorative paper held in place with a rubber band or twine. Number each lid, and stack the cans in a pyramid, a tree shape, or neat rows on a table or a shelf.
This project reuses cans that would otherwise be recycled, and it creates a sturdy calendar that children can handle without breaking it. Paint the cans in Christmas colors, or wrap them in paper for a cleaner look. Make sure the can edges are smooth and safe before children reach inside. After Christmas, save the cans and refill them next year with new treats.
14. A Magnetic Board with Numbered Tins

Attach 24 small magnetic tins to a metal board, a cookie sheet, or a magnetic wall panel. Number each tin, fill it with a small treat, a note, or a tiny ornament, and arrange the tins in a grid or a tree shape. The magnets hold the tins firmly, but they lift off easily each morning.
This calendar is neat, reusable, and easy to refill. Use small round tins with clear lids so children can see the treats inside, or solid lids for a surprise. Paint the board in a Christmas color, or leave it plain and add a festive border. A magnetic calendar works well in a kitchen, where the board can hang on a fridge or a wall and everyone can reach it.
15. An Activity Jar for Family Fun
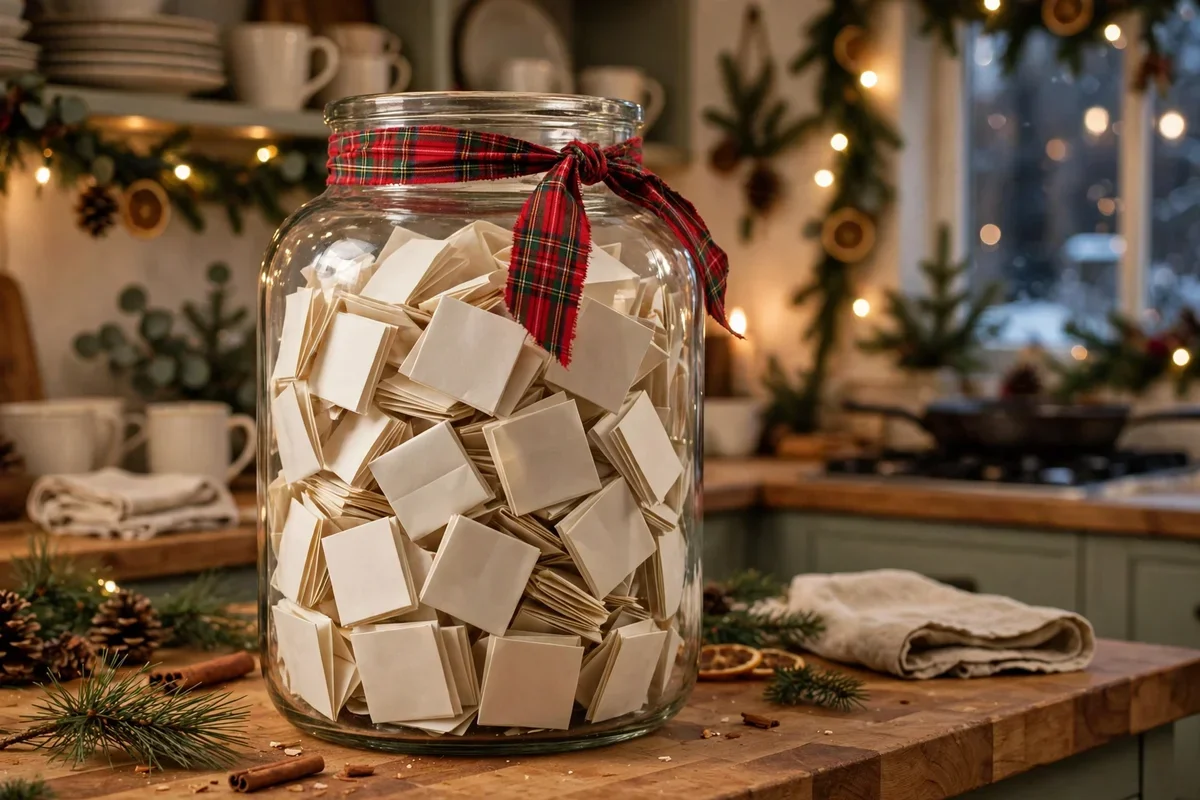
Fill a large glass jar with 24 folded slips of paper, each one with a simple family activity written on it. Number the slips, or draw one at random each morning in December. Activities can include baking cookies, making ornaments, watching a Christmas movie, or delivering a treat to a neighbor.
This calendar costs nothing, it takes minutes to make, and it focuses on time together rather than treats. Use a pretty jar, tie a ribbon around the neck, and place it on a kitchen counter or a dining table. Let children take turns drawing the slip each day. Keep the activities short and realistic for busy December days, and save longer outings for weekends.
16. A Wooden Advent House with Drawers

Use a small wooden box, a set of tiny drawers, or a craft store advent house with 24 small compartments. Paint it in Christmas colors, number each drawer, and fill it with small treats, notes, or tiny toys. This calendar becomes a keepsake that you refill every year, and it looks beautiful on a mantel or a shelf.
Wooden advent houses are available at craft stores, or you can build one from small boxes glued together. Keep the treats small, because the drawers are tiny, and add one special gift in the final drawer for Christmas Eve. A wooden calendar is sturdy, it stores well, and it often becomes a family heirloom that children remember as adults.
17. A Pocket Calendar Sewn from Fabric Scraps

Sew or glue 24 small pockets from fabric scraps onto a backing panel made from an old pillowcase, a tea towel, or a piece of linen. Add a dowel at the top, number each pocket, and fill it with a small treat or a note. This calendar uses up fabric scraps, it is soft and safe for young children, and it folds flat for storage.
Choose fabrics in a mix of Christmas prints and solids, or use one color family for a calmer look. If you do not sew, fabric glue works well for small pockets. Hang the calendar on a door or a wall where children can reach the lower pockets easily. This project takes an afternoon, but it will last for many Christmases.
18. A Simple Printable Advent Calendar

Print 24 numbered cards or a single sheet of doors from a free printable, cut them out, and tape them along a wall, a kitchen cabinet, or a fridge. Behind each card, hide a small treat, a note, or a sticker. This is the fastest DIY advent calendar idea, and it is perfect when December arrives before you have time for a bigger project.
Choose a printable style that matches your home, from a simple numbered grid to a festive Christmas tree. Use cardstock for durability, and tape the cards securely so they do not fall. Let children color the cards before you hang them, and the calendar becomes a handmade decoration as well as a countdown. A printable calendar is a great backup plan, and it still makes each December morning feel special.
A handmade advent calendar is about more than the treats inside. It is about slowing down each December morning, sharing a small surprise, and building a tradition your family looks forward to all year. Choose a project that fits your time and your home, start early, and keep it simple. The calendar you make this year may become the one your children remember long after they are grown.
Frequently Asked Questions
Should an advent calendar have 24 or 25 days?
Use 24 numbered spaces for December 1 through Christmas Eve, or add a 25th space to include Christmas Day. Both are common. Choose 24 if you want the countdown to end on Christmas Eve, or 25 if you want a special surprise on Christmas morning. Make the final day a little bigger than the others.
What can I put in a DIY advent calendar for kids?
Fill it with small treats, stickers, tiny toys, coins, hair clips, or notes with jokes and activities. Mix treats with non food surprises, such as a small puzzle piece, a temporary tattoo, or a coupon for a family activity. Keep items small, safe for the child’s age, and easy to fit in the container you choose.
What can I put in a DIY advent calendar for adults?
Adults enjoy small luxuries such as mini candles, tea bags, coffee samples, bath salts, lip balm, chocolates, or handwritten notes. A bottle advent calendar, with a small bottle for each day, is a fun option for adults over 21. Keep the fillings personal, and save the best items for the final week.
How early should I start making a DIY advent calendar?
Start in early November so the calendar is finished and filled by November 28. Paper and envelope calendars take an evening, felt and fabric calendars take a weekend, and wooden or village calendars can take longer. Starting early keeps the project relaxed and fun instead of rushed.
How do I make an advent calendar reusable?
Choose sturdy materials such as felt, fabric, wood, metal tins, or mason jars. Fill the calendar with new treats each year, and store it carefully after Christmas in a dry place. Avoid glue and paper that will tear, and use pockets, drawers, or bags that can be opened and refilled many times.